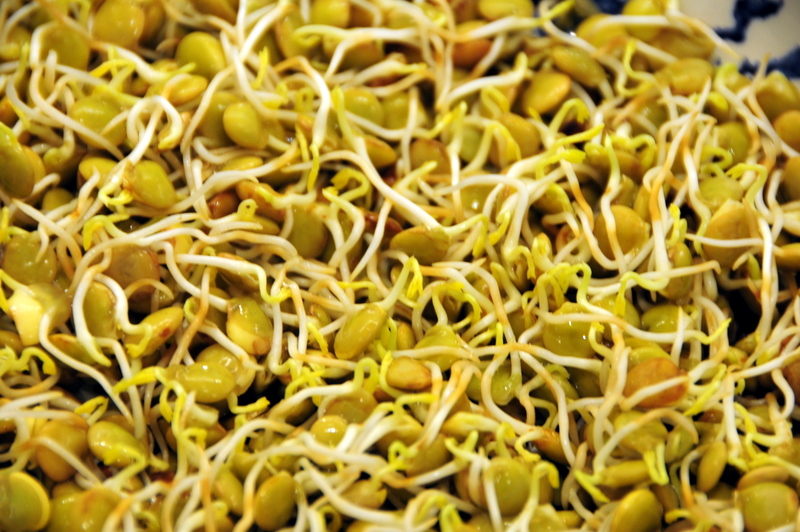
I sprouted my own lentils after reading about their many nutritional benefits, ease of digestion etc. You can read more about the benefits of sprouting here and here.
Sprouting your own seeds and grains turns out to be incredibly fun. Really it takes me back to my childhood. Did you ever grow seeds in the science lab at school? Wasn’t that awesome? I remember we sprouted corn, beans, rice and other seeds in cotton balls in little jars and cans. It was so cool seeing life reaching out for sunlight. I remember that I nibbled on some without even knowing how tasty or wholesome they are. I was a curious child. Had I known, I might have gone into a new line of work: sprouted grains. Then, I’d be totally rich now and my cellar packed to the brim with first growth Bordeaux. What a dream…
When the experiments were over, some of these seeds, mostly the corn, would make their way back home where I would plant them in our vegetable garden. It was magical seeing the transformation from freaky science experiment to sturdy plant. I still like to play in the dirt.
But back to my kitchen… I had a cup of whole red lentils in the cupboard that kept falling off the shelf every time I grabbed something from there, so last week I decided to put them to use. Sprouting is very simple to do:
Day 1: Pick lentils over, removing stones and damaged seeds. Soak lentils in fresh water for about 6 hours, drain, rinse, spread on a ceramic tray partially covered with something opaque. I used another ceramic tray. Place in a cool place in the kitchen away from direct light.
Day 2: Rinse three times, being careful not to break the tiny shoots that look like little hooks already appearing attached to most of the seeds. Return to the same tray with cover.
Day 3: Repeat process from day 2
Day 4: Repeat process from day 3.
By now sprouts should be about 1cm long. If they’re not long enough or you wish a bit more length, repeat process from Day 2. Otherwise uncover and let sprouts receive more sunlight (indirect) to photosynthesize. Tips of the sprouts will turn green. One afternoon should do the trick. Spray a bit of water on seeds if you notice them drying out. Rinse again, place in a plastic bag and store sprouted lentils in the fridge for up to one week.
These lentils, now considered ‘live,’ tasted sweet, nutty, grassy and had a bit of a crunch… simply delicious.
You can eat them raw or cooked, added to sandwiches, stir-frys, breads, omelets and salads.

Comments on this entry are closed.
You are my hero! I’ve been wanting to sprout my own beans or lentils for so long now that I almost gave up on the idea. Now you’ve inspired me again. 🙂
What a wonderfully healthy thing to do. 🙂 As soon as I settle down in my own place, I can’t wait to start doing things like this. 🙂
Lovely reminder I haven’t sprouted anything in years but it sure does beat thouse soggy packs of sprouts from the supermarket
Sounds delicious, I love the taste of fresh sprouts and I bet these are up there in yumminess. I am going to have to give this a try.
This does sounds fun…and love them raw on salads 🙂 Love this photos as well!
OK I will try it; for some reason it reminds me of some mung beans that I had at an Indian restaurant and I almost choked on them. I am tempted here because you are using red lentils of which I always have an ample supply.