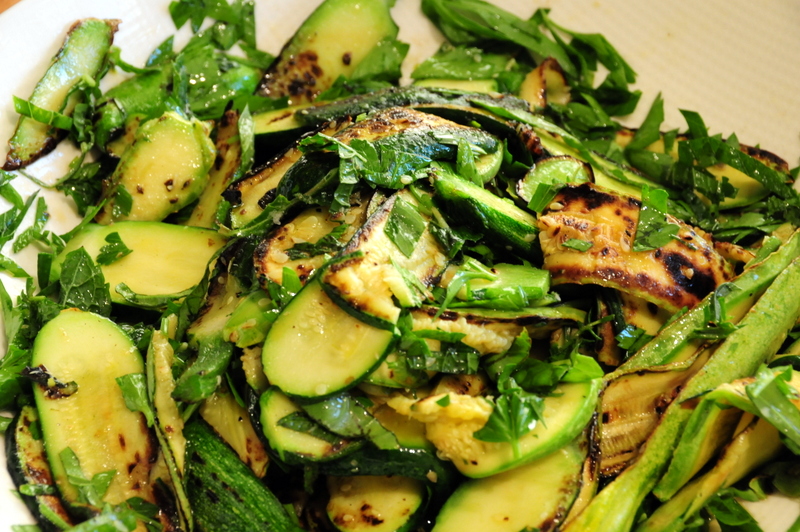
grilled zucchini salad with fresh garden herbs

We are still enjoying home-grown zucchini from our prolific community garden plot squash plants. It feels so good just going there to water them. We find new ones growing full swing every time. It seems to happen overnight!

grilled zucchini salad with fresh garden herbs

grilled zucchini salad with fresh garden herbs

This recipe comes from this lovely blog, not without salt (I so wish that I’d come up with that name for our blog!) that I’ve been enjoying reading recently. Really, the dish is very simple and most of the ingredients came directly from our community garden. The flavors are super vibrant!

The recipe calls for grilling the thinly sliced zucchini. Our grill had no gas so instead I seared them in a pan. But this didn’t make the final result any less delicious.

This is perfect for a tapas style meal, or served as a side dish.

grilled zucchini salad with fresh garden herbs

3 zucchini, sliced thinly
Arbequina olive oil
Kosher salt
Freshly ground black pepper
1 tbsp fresh basil, chopped
1 tbsp fresh tarragon, chopped
1 tbsp fresh mint, chopped
1 tbsp fresh Italian parsley, chopped
Zest of ½ lemon
Juice of a whole lemon

Place a non stick skillet on stove top and bring temperature to high. Meanwhile put sliced zucchinis in a bowl, drizzle with olive oil, sprinkle with salt and pepper. Toss to coat using your hands. Lay zucchini slices on hot surface in a single layer and pan grill it for about a minute or so on each side. Remove from pan, repeat process with remainder. While zucchini slices are still warm add herbs, zest, lemon juice more salt and pepper and olive oil to taste. Toss to combine. There you have a tasty and elegant side dish to enjoy!

If there are any leftovers make a sandwich with it the following day like I did. All you need is to have a nice piece of fresh crusty bread and stuff it with some of the grilled zucchini, chévre and a drizzle of a good olive oil.

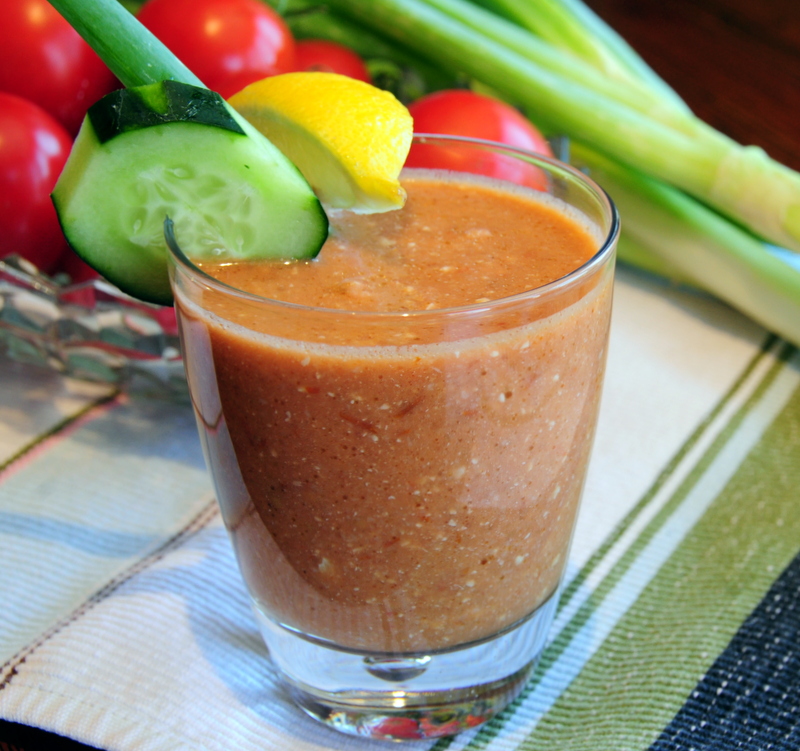
Cherokee tomato gazpacho

I’m so excited! We just came back from the Alemany farmers market after a quick stop at our community garden plot. The garden’s doing great but the market was amazing! Goodbye to all those tiresome root vegetables—at least for now. Heirloom tomatoes are back! It isn’t quite mid-summer yet but they’re starting to look good. I was delighted with the selection. Plus we bumped into our friend John shopping at the same time. There’s a real community experience to be had at local farmers markets. Sure, it can happen at large supermarkets too, but somehow I always get so weighted down by the fluorescent lighting at places like that that I’m desperate to get in-and-out, so never consider socializing. This visit to Alemany almost felt like Brazil when we would meet several of our neighbors on market days.

Cherokee tomato gazpacho

Cherokee tomato gazpacho

There was a lot to choose from, and I indulged. This week we bought different types of tomatoes, fresh aromatic garlic that had just been harvested, stone fruits, cucumbers and more! I had my eyes on a stall where they were selling organic overripe heirloom purple Cherokee tomatoes. At just $1.50 a pound, what a bargain! These were a bit too soft for a salad but that’s what I wanted, as they looked perfect for gazpacho.

With this relatively warm weather (I realize that most of the Country is experiencing record-breaking heat, but in San Francisco, it’s only warm-ish) what could be better than a cool gazpacho soup for lunch made with exceptionally fresh ingredients?

I went for an international style here: California heirloom tomatoes, of course the soup idea comes from Spain, I added a tropical Brazilian touch with cashew nuts and garnished with refreshing Japanese cucumber, my favorite.

Cherokee tomato gazpacho

2½lbs ripe organic heirloom purple Cherokee tomatoes, quartered
1 clove of the freshest garlic, minced
½ cup Arbequina olive oil
½ Italian baguette, cut up coarsely
1 tbsp sherry vinegar
½ cup raw cashew nuts
Kosher salt to taste
Fresh black pepper
½ cup water
a few scallions, sliced thinly, both green and white parts
1 Japanese cucumber, sliced

Place bread, garlic, water, salt, cashew nuts, sherry vinegar, pepper, ¾ of the olive oil, ½ of the tomatoes in the food processor and whiz until smooth. Transfer to a bowl. Add rest of the tomatoes to the food processor and whiz again until smooth. Mix it with the first batch. Taste, adjust flavors. Add one or two ladles of soup to a cup or bowl, drizzle with olive oil and garnish with sliced scallion and cucumber. Chill the rest to eat later—if you have any left!

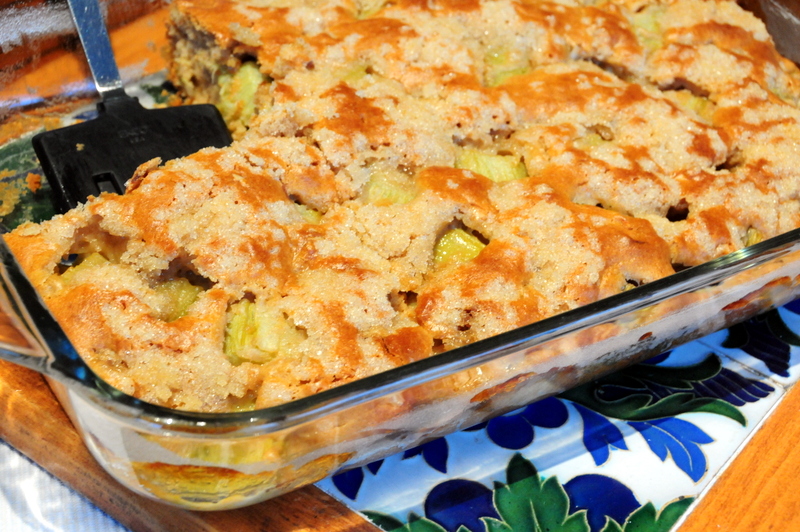
rhubarb and buttermilk quick bread

This is my first time ever cooking rhubarb. I have eaten it before of course. Steven made a beautiful rhubarb streusel cake last year. His recipe used rhubarb with very red stalks. At the time I didn’t think much of it. The stalks are always red, no?

rhubarb and buttermilk quick bread

rhubarb and buttermilk quick bread

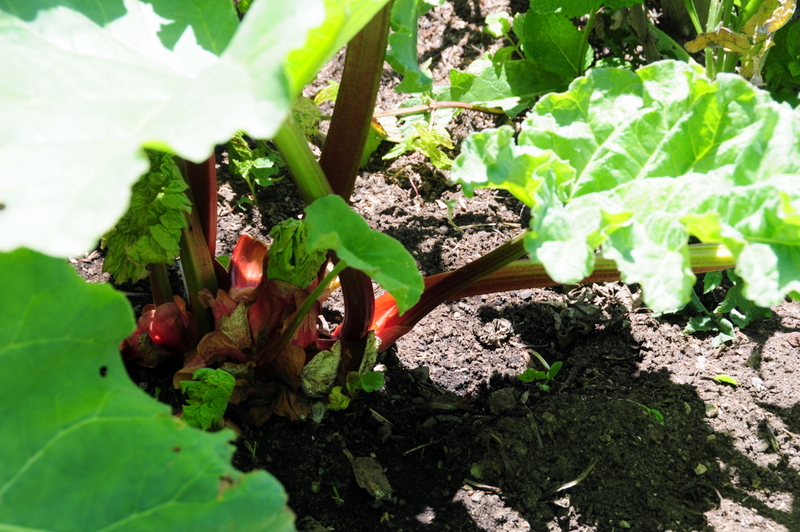
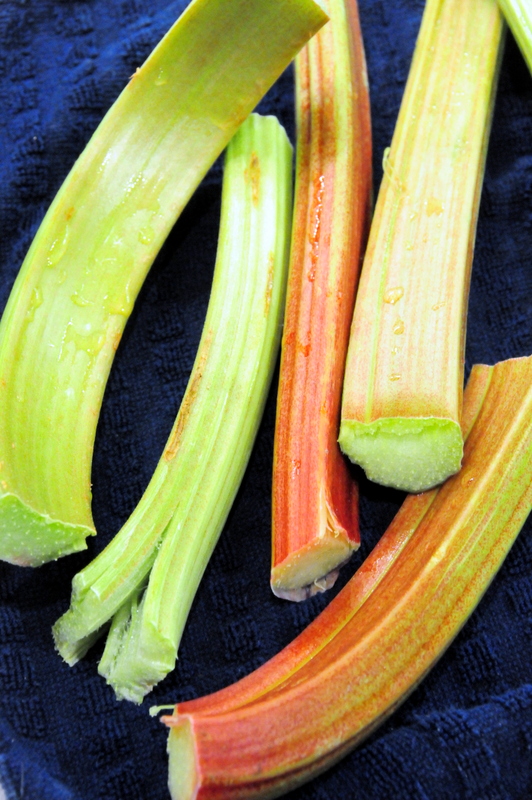
We inherited a rhubarb plant in our new garden plot. The leaves are enormous and so are the stalks. We waited and waited for them to turn red but they never did. They only sort of reddened at the base of the stalk. I thought that they looked ready but what’s up with that color?

Last week I decided to harvest some of the stalks still ‘green’ just to give them a try. Since everyone knows that rhubarb can be poisonous, I read up on it. Turns out that there are several types and that the green ones with red at the base of the stalks is a traditional variety and are fully mature and ready for harvest. Hooray!

my picked over rhubarb plant

my picked over rhubarb plant

rhubarb from my community garden plot

rhubarb from my community garden plot

Sadly, that same informative site recommends refraining from harvesting after the end of Spring to give the plant time to recover. So this is it for this year. Those jams and chutneys will have to wait till 2013.

This recipe comes from rhubarb-info. It is a very informative site. Some more interesting facts about Rhubarb can be read here. I’ve changed the flour types, oil, nuts and the amount of rhubarb.

I love the combo sweet and sour rhubarb flavor. It goes perfectly with a good cup of coffee.

rhubarb and buttermilk quick bread

~ 2-3 cups ripe rhubarb stalks, cut into chunks
1½ cups brown sugar
2/3 cup almond oil (or other neutral oil such as canola)
1 large egg
1 cup buttermilk
1 tsp salt
1 tsp baking soda
1 tsp vanilla
1½ cups flour
1 cup whole wheat flour
½ cup of mixed broken almonds and walnuts
1½ tbsp butter at room temperature
¼ cup coarse sugar

Preheat oven to 350 F. Grease and flour a 13”x9” Pyrex glass dish.

Whisk together brown sugar, egg and oil. Add salt, buttermilk, baking soda, vanilla and flours. Continue mixing to incorporate. Fold rhubarb and nuts into batter. Transfer batter to baking dish and spread evenly.

Mix sugar and semi-soft butter until crumbly. Sprinkle over batter.

Bake for 50 to 55 minutes, or until bread passes the toothpick test.

Cool and serve.

shiitake mushroom polenta with truffle salt

Polenta is a popular staple back home in Brazil. I grew up eating lots of it and never got bored. My mother cooked it on her fire wood stove in an iron pan. It had to cook forever! So she would use a wooden spoon to stir it occasionally while she prepared other delicious dishes at the same time. Wood fires are tricky and you can’t always get excellent temperature control. Occasionally the polenta would burn a bit at the bottom. That was the part I liked the most. That burned crust had a singular smoky flavor whose memory makes my mouth water. Mom didn’t like it, despite everyone praising it to the skies. She was a perfectionist in the kitchen.

shiitake mushroom polenta with truffle salt

shiitake mushroom polenta with truffle salt

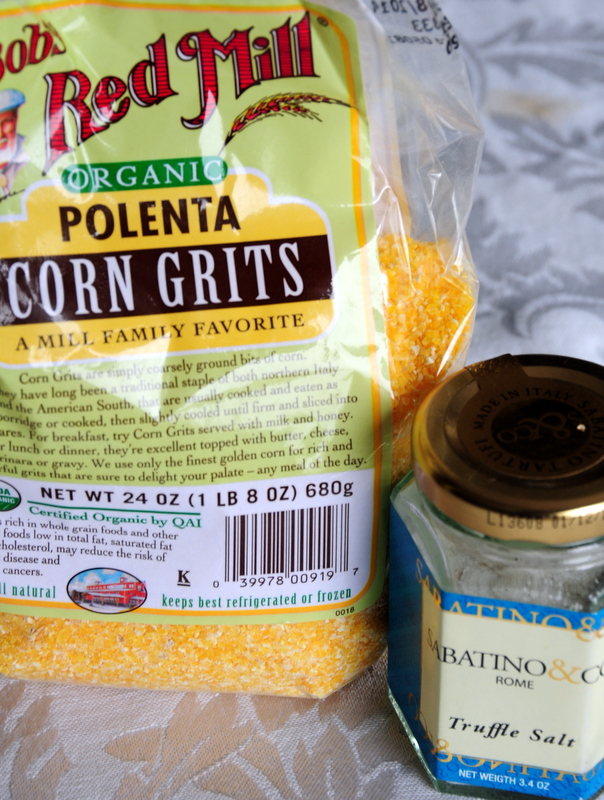
my polenta and truffle salt--thanks for that Devaki!

my polenta and truffle salt--thanks for that Devaki!

My mother made her polenta in one of two ways. Both started with just corn, salt and water. For the first variation, she’d cover it with a nice tomato sauce. Alternatively, she’d let it harden then cut it into finger-sized pieces which she’d fry in hot oil. Sometimes day old polenta would appear for our breakfast too. Delish!

Yotam Ottolenghi in Plenty tells the story of his dad making polenta for him while growing up which reminded me of my own childhood. So this dish is in the spirit of Ottolenghi’s father and my mother. I’ve modified his recipe mostly because I didn’t have all the ingredients. And of course I made the polenta mom’s way (on an electric stove if you were wondering).

shiitake mushroom polenta with truffle salt

6½ cups vegetable broth*
2 cups yellow corn grits (I used organic Bob’s Red Mill)
1 tsp kosher salt
½ cup 6 month aged Manchego cheese, sliced thinly
1/3 cup grated Parmigiano-Reggiano
Kosher salt
2½ cups fresh shiitake mushrooms, halved with stems if soft enough
Truffle salt
3 tbsp butter
4 tbsp olive oil
1 tbsp chopped chives
3 cloves garlic, minced

*for the broth:

1 carrot
2 shallots
1 stalk celery

Begin by making the broth. Fill a pot with 8-10 cups of water, add celery, carrot and shallot, bring to a boil and simmer for 15 minutes. Discard solids.

Add 6 and ½ cups veggie broth to a heavy bottomed pan and bring it to a boil. Add salt, gradually stir in corn grits. Reduce temperature to medium low and cook for 30 minutes. You need to stir it frequently to prevent sticking. A whisk does this job fairly well.

Ten minutes before polenta is ready turn the broiler on and prepare the mushrooms. Heat a large skillet on high. I did mine in two batches. Add ½ of the olive oil. Once it becomes aromatic, toss in half of the mushrooms and sauté them until slightly caramelized on the cut side. Stir to cook evenly. In the last minute, add ½ of the garlic. Toss together with mushrooms and just cook long enough for raw aromas to dissipate. Transfer to a bowl and keep warm. Repeat process with the second batch.

At this point polenta should be ready. Turn heat off. Add butter and Parmegiano-Reggiano. Stir. Add a bit more kosher salt if needed. Pour into a serving platter. Spread slices of Manchego cheese over the finished polenta. Broil the dish long enough for cheese to melt and become bubbly, about a minute or so. Remove from oven, top polenta with mushrooms and sprinkle with truffle salt. Return to the oven and broil for a couple of minutes more. Remove from heat. Sprinkle with chives and voilá!

Barking Frog Grille, Sedona, Arizona

Who wouldn’t want to eat at a place called the Barking Frog? When I was researching restaurants for our recent Sedona vacation, the name really caught my eye. Plus I loved the menu: full of exciting Southwest cuisine. I really miss this kind of food since I’ve moved away from Texas in the mid-1990s. Sure I know that it’s different in Arizona compared to Texas. But still, these are the flavors of my youth.

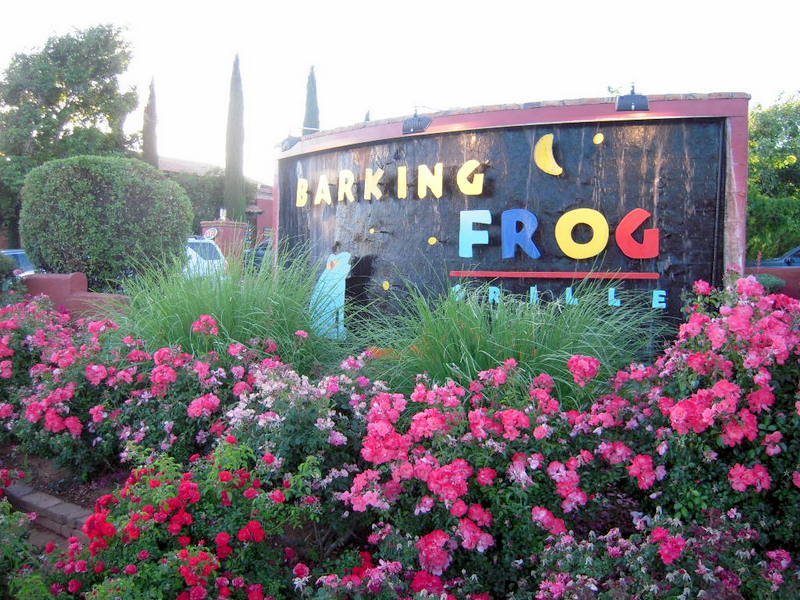
welcome to the Barking Frog Grille

welcome to the Barking Frog Grille

They’ve a sister restaurant in the tourist-trap part of town, Cowboy Club and Silver Saddle Room. We stumbled into that place for a drink on a hot afternoon not realizing the two were connected. I loved the whisky sampler and both of us enjoyed the thrilling cactus fries. Hegui promised to try making that at home sometime. I’m still waiting.

We didn’t order that at Barking Frog. We wanted to try something new.

here I am hungrily sitting in front of the Barking Frog Grille

here I am hungrily sitting in front of the Barking Frog Grille

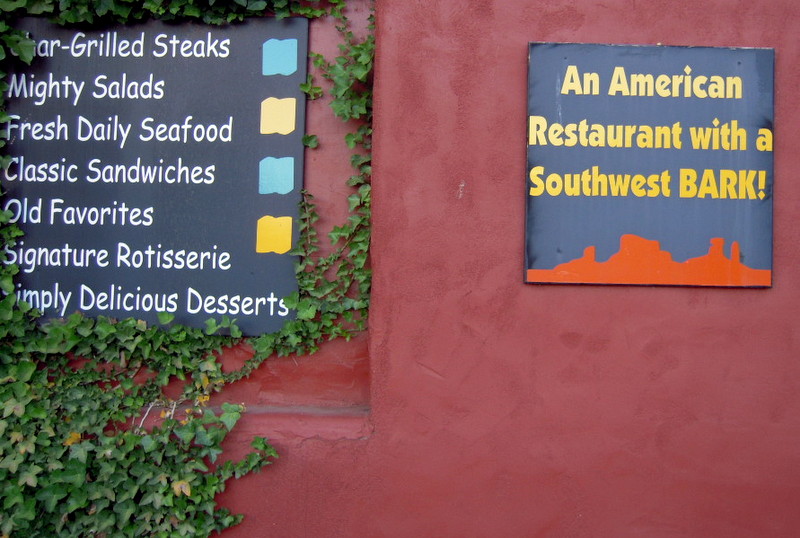
cool subtitle to the Barking Frog Grille

cool subtitle to the Barking Frog Grille

I made a reservation for a Wednesday evening. The restaurant is huge with numerous very widely spaced tables in dim lighting. Hegui was preoccupied with the relative darkness (Heartline Café was really dark, too). And it is pretty jarring, insofar as the sun shines so brilliantly in Sedona. I made what I think is a funny video of him ranting on this topic.

We had great service though there was some problem with the hostess staff. Upon our arrival, we were immediately seated at a spacious corner table in a large dining room. A few minutes later, a rather officious hostess aggressively approached us and demanded to know how we had gotten to our table. Weird, right? So I said that the other hostess sat us… I mean, how else would we have gotten there? (I guess that I might have said “we walked” but I was in a good mood after our sunrise hot air balloon ride that day.) She replied with something like, “so they just sat you here?!” then she rushed off. So bizarre!

blurry Barking Frog interior

blurry and dim Barking Frog interior

Well after we recovered from the shock with a round of beer, we ordered the chili dusted calamari and the Caesar salad with cornbread croutons. Both were good though my pics turned out horridly—it has to be the dimness of the dining room—so I’m going to let you use your imaginations here.

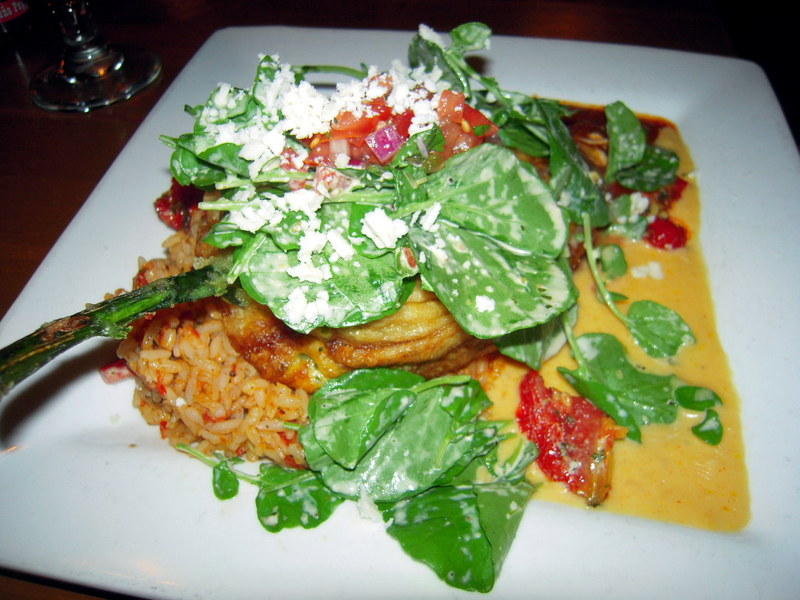
Barking Frog Grille poblano relleno

Barking Frog Grille poblano relleno

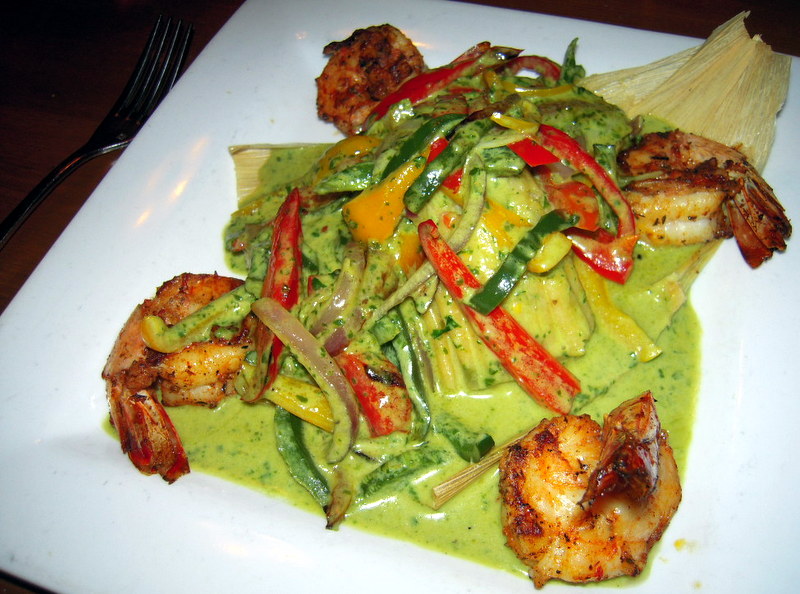
Barking Frog Grille shrimp tamale

Barking Frog Grille shrimp tamale

For his main, Hegui had the scrumptious poblano relleno stuffed with cheese in a roasted corn cream sauce and a chipotle tomato sauce. Mmmm! I had the amazing shrimp tamales. The dish was huge, messy and wonderful.

By then we were completely stuffed. Dessert was out—sorry Heavenly.

Except for the odd seating mishap, we had an excellent experience at the Barking Frog.

looking down from our hot air balloon

looking down from our hot air balloon

inside our hot air balloon

inside our hot air balloon

memorable Sedona sunrise

memorable Sedona sunrise

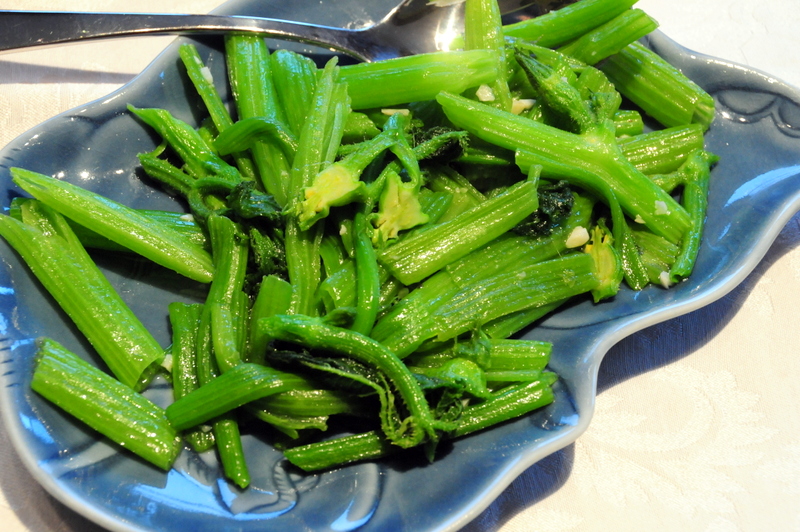
cambuquira refogada AKA summer squash shoot sauté

My home state of Minas Gerais in Brazil has a varied cuisine. Mainly focused on meat and amazing sweets, the “side” vegetable dishes rock too. I especially enjoy those made with unusual veggies, such as giló, similar to eggplant with a slight bitterness, almeirão, somewhat similar in taste to escarole or frisée, couve mineira, a very tender kind of collard green that tastes really good added to salads, and chayote, which is available in the US. Another vegetable that I grew up eating is cambuquira, though I never see that one here.

cambuquira refogada AKA summer squash shoot sauté

cambuquira refogada AKA summer squash shoot sauté

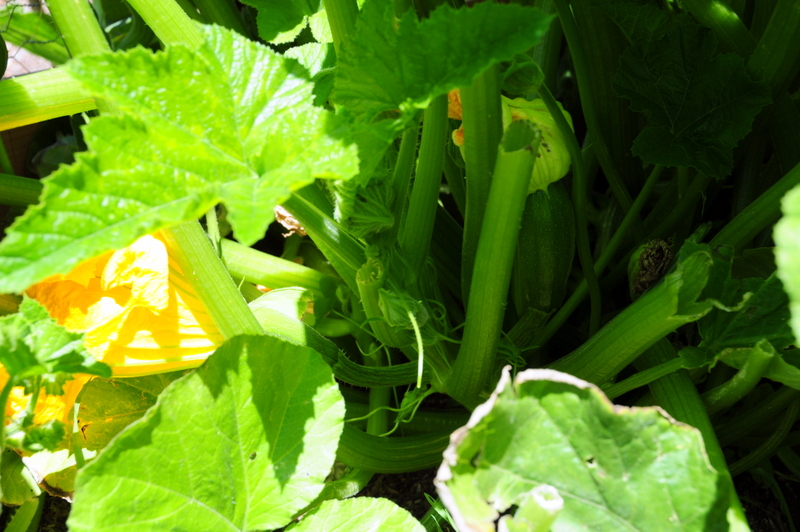
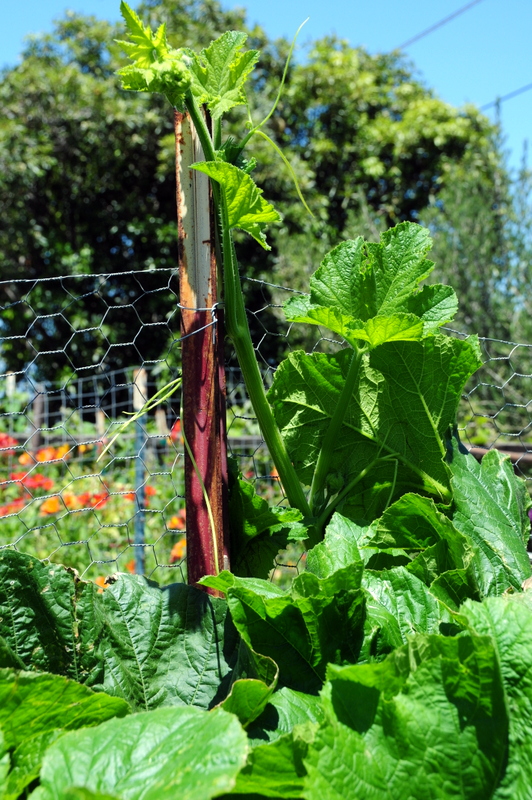
Cambuquiras are the tender shoots of summer squash and pumpkin plants.

Squash and pumpkin take lots of space to grow. Now that we have a larger garden plot we planted a few. We’ve got at least three kinds: zucchini, yellow squash and patty pans. They’re growing so fast that they’ve begun shading and crowding out the tomato plants. Our “solution” to this “problem” was to thin them out. In Minas, pumpkin shoots are never wasted. So really I ended up harvesting them for dinner.

To harvest squash shoots, break them off about 20 inches from the very ends. Be careful because they have lots of little spikes. I took about 15 shoots for a side dish for three people. You need to peel the outer skin away (with the spikes). Do that by breaking them into smaller tubes, about 8 inches long. As you break them you’ll be able to peel the skin away. It is a bit labor intensive but well worth it. Keep the tiny little leaves, as even though they have some spikes, they’re extremely flavorful and the spikes will disappear with cooking. We also had some tiny squashes attached at the ends of ours, which is lovely.

one of our summer squash plants with flowers and shoots

one of our summer squash plants with flowers and shoots

squash shoot reaching for the sky

squash shoot reaching for the sky

My mother used to sauté them in rendered pork fat and garlic. That was long ago. Here’s a vegan version:

cambuquira refogada AKA summer squash shoot sauté

1 bunch of summer squash shoots, cleaned as described above
3 garlic cloves, minced
Sea salt
Freshly ground black pepper
4 tbsp olive oil

Heat 3 tbsp of olive oil in a skillet on high. As soon as you notice the aroma of warm olive oil, add garlic and sauté for few seconds. Add cambuquira shoots, salt and toss to combine. Cover and cook on high temperature for about 8 minutes or until soft with an al dente texture. If too dry add one tbsp of water to prevent burning. Transfer to a serving platter, drizzle remaining olive oil over with sprinkles of black pepper. I served this as a side to go with mushroom polenta.

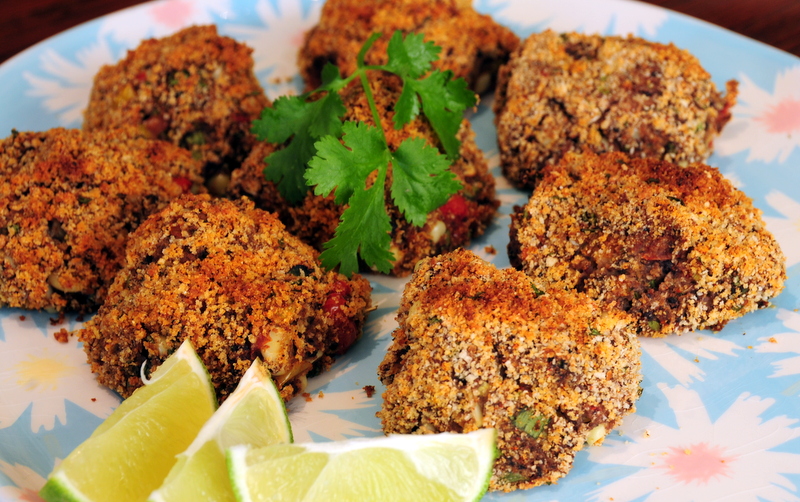
Southwest black bean and fresh corn croquettes

This delightful recipe comes from Eating Well. I was feeling inspired after Hegui made those tremendous red lentil croquettes. We eat a lot of beans at home and frankly it gets a bit boring just having them tossed with garlic and olive oil after a while. Sure, that always tastes great, but variety is the spice of life.

Southwest black bean and fresh corn croquettes

Southwest black bean and fresh corn croquettes

This dish certainly has variety, and spice. I used 4 cups of black beans that I rehydrated myself, rather than the suggested two cans. That turned out to make enough for a “double” portion of the croquettes, which means since I only had enough salsa ingredients for the original Eating Well recipe, I didn’t have any leftover to garnish. I used fresh corn which I cut from two ears. For some reason my “batter” was a bit runny, so I ended up adding more breadcrumbs. Also I used dried pasilla powder and chile in adobo instead of chili powder for the spice. Yum!

Southwest black bean and fresh corn croquettes

4 cups prepared black beans
2 tsp cumin
2 ears sweet corn, corn cut from cobs
~1 cup Italian breadcrumbs
2 cups chopped tomatoes
4 scallions, chopped
1 small bunch cilantro, chopped
2 tsp pasilla powder
1 chile in adobo, minced
Kosher salt to taste
2 tbsp olive oil

Preheat oven to 425F. Cover a baking tray with parchment paper.

Mash black beans with cumin in food processor. Remove to a bowl. Add corn, tomatoes, scallions, 1 tsp pasilla powder, chile in adobo, cilantro, salt and enough breadcrumbs to make batter firm enough to shape. Mix well.

In another bowl, mix ½ cup breadcrumbs, 1 tsp pasilla powder, a pinch of salt and olive oil together.

Shape batter into balls and gently roll into breadcrumb mixture. Bake croquettes about 20 minutes until they become a golden brown.

Serve warm or at room temperature with lime wedges. These would be particularly tasty floating on some tomatillo salsa.

Community Garden Plot #17 update: California land grab

Greed never pays. Listen to what happened to us and our new, dramatically bigger community garden plot.
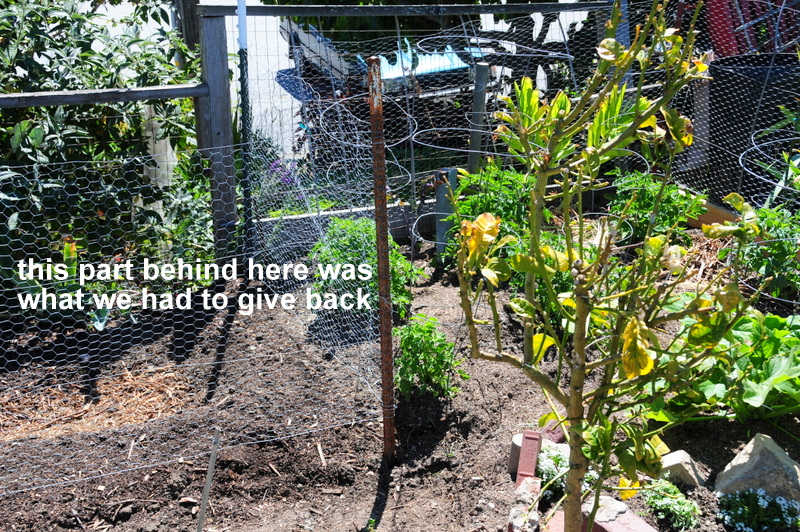
here you can see the part that we had to return

here you can see the part that we had to return

After a couple of arduous weekends working on our new plot: digging, cleaning debris, adding topsoil, planting boundary poles and installing wood planks to hold the soil back, then finally wrapping the whole lot in chicken wire, we thought we were happily done with delimiting the grounds and were finally ready to do the actual gardening. What a chore! I had pain in muscles that I hardly even knew existed.

Many of our community garden neighbors came by to congratulate us on the job and wish us luck with the new plot. Steven even quoted Robert Frost’s “good fences make good neighbors.” We were content.

Well that lasted for less than a week or two, then the unthinkable: we received an email from our community garden coordinator apologizing for his mistake in determining the boundaries of our new plot 17. Noooooooo!!!!!!!!!! He wanted us to give some land back. And after all that work!

He claims, though it was his mistake, in fact we misappropriated part of plot 16, at the time a pebble strewn, overgrown nothing that had been vacant for at least a year or more. He wanted us to re-do the fencing, and so sorry about all the tomatoes that you’ve planted, but, um, they simply have to go. We were flabbergasted by his mistake and demands. We flirted with the idea of suing the community garden, but that’s expensive and likely not to get much traction. Naturally, we protested on the grounds that we were innocent victims here. And what about all the work, time, energy and money we had already invested?
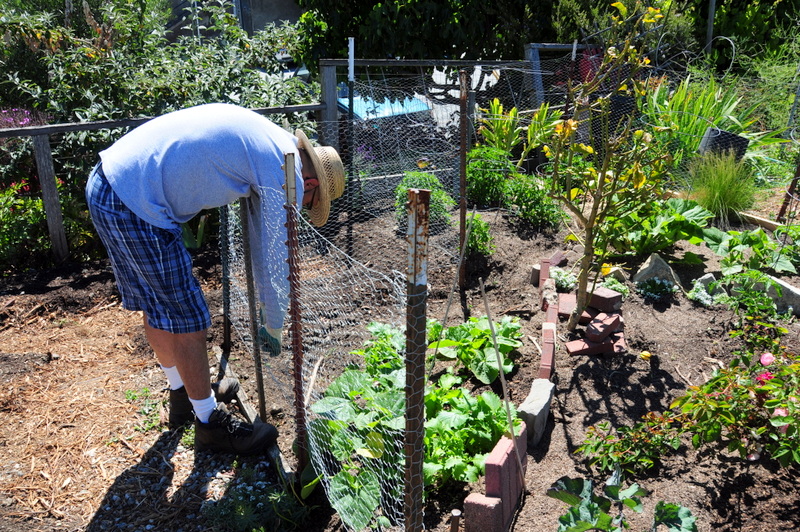
here I am breaking my back to tie off the chicken wire around the new boundary line

here I am breaking my back to tie off the chicken wire around the new boundary line

But it was to no avail. I wonder if this is how the ‘49ers felt when they made the horrific trek cross country to California to strike it rich with a goldmine, only to have their hopes dashed when the land got snatched back from under their feet? I bet that happened a lot in the old days.

Morgan was sincerely sorry for the problem he caused and offered to assist us in moving the fence. He even volunteered to remove a couple of annoying stumps that were sort of on the new boundary. That was nice. We were just super upset. Plus we were about to go on a vacation that had been planned for months. Eventually we told him that we’d comply but at our own pace (i.e. after vacation). What a letdown!

So we went to Arizona and Death Valley. And Morgan more than lived up to his word. Not only did he move the fence on his own, he also removed the stumps and brush around them while we were at work. That really was cool. The shrunken plot didn’t shrink quite that much it turns out. Only about a 5’ by 5’ section on the border with #16 was reallocated, which is probably about a tenth of the entirety of #17. So we were happy again!
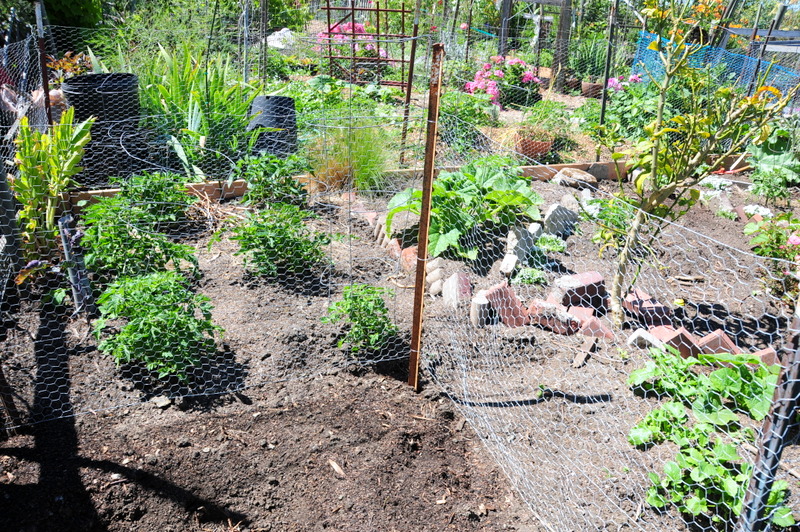
view of plot 17 from the land reallocated to plot 16

view of the revised plot 17 from the land reallocated to plot 16

We did have to do a bit of work straightening the fence and adding a few more planks to secure the dirt on the new border, but nothing major. Our plants are thriving. We just recently had our first harvest of broccoli rabe which I prepared with pasta. We ate it for lunch after a few hours of intense labor at the plot on a sunny Saturday morning. It was so successful that we planted a few more beds to rabe. Already they’ve begun sprouting.
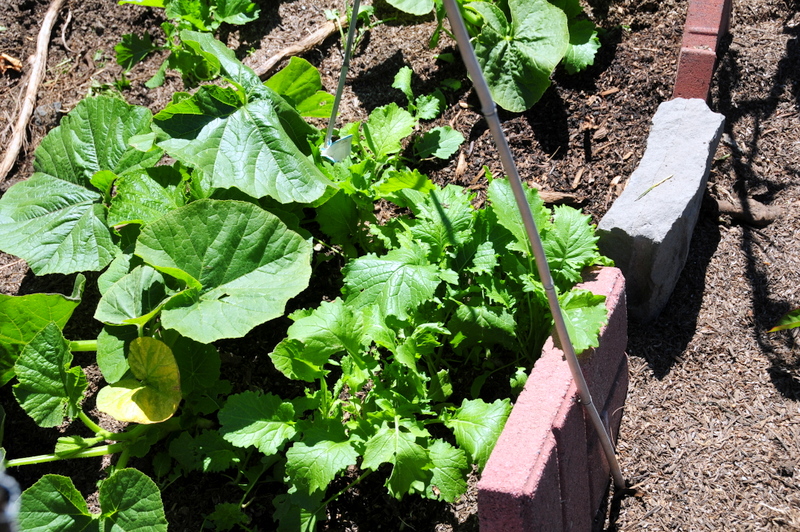
broccoli rabe and squash

broccoli rabe and squash

The tomatoes and various squash are really coming along. The transplanted artichoke has recovered and is doing well. We sowed a whole bunch of new veggies from exotic heirloom seeds that our friend Michelle mailed to us from New York. The rhubarb plant that came with the plot is making gigantic leaves. Some of the stalks are over 20 inches long, though still green. Our gardener neighbor gave us some confusing advice about rhubarb but suggested that it makes an excellent chutney.